How Much Wind Can a Beginner Drone Handle?
Bywpdev
Beginner Wind Decision
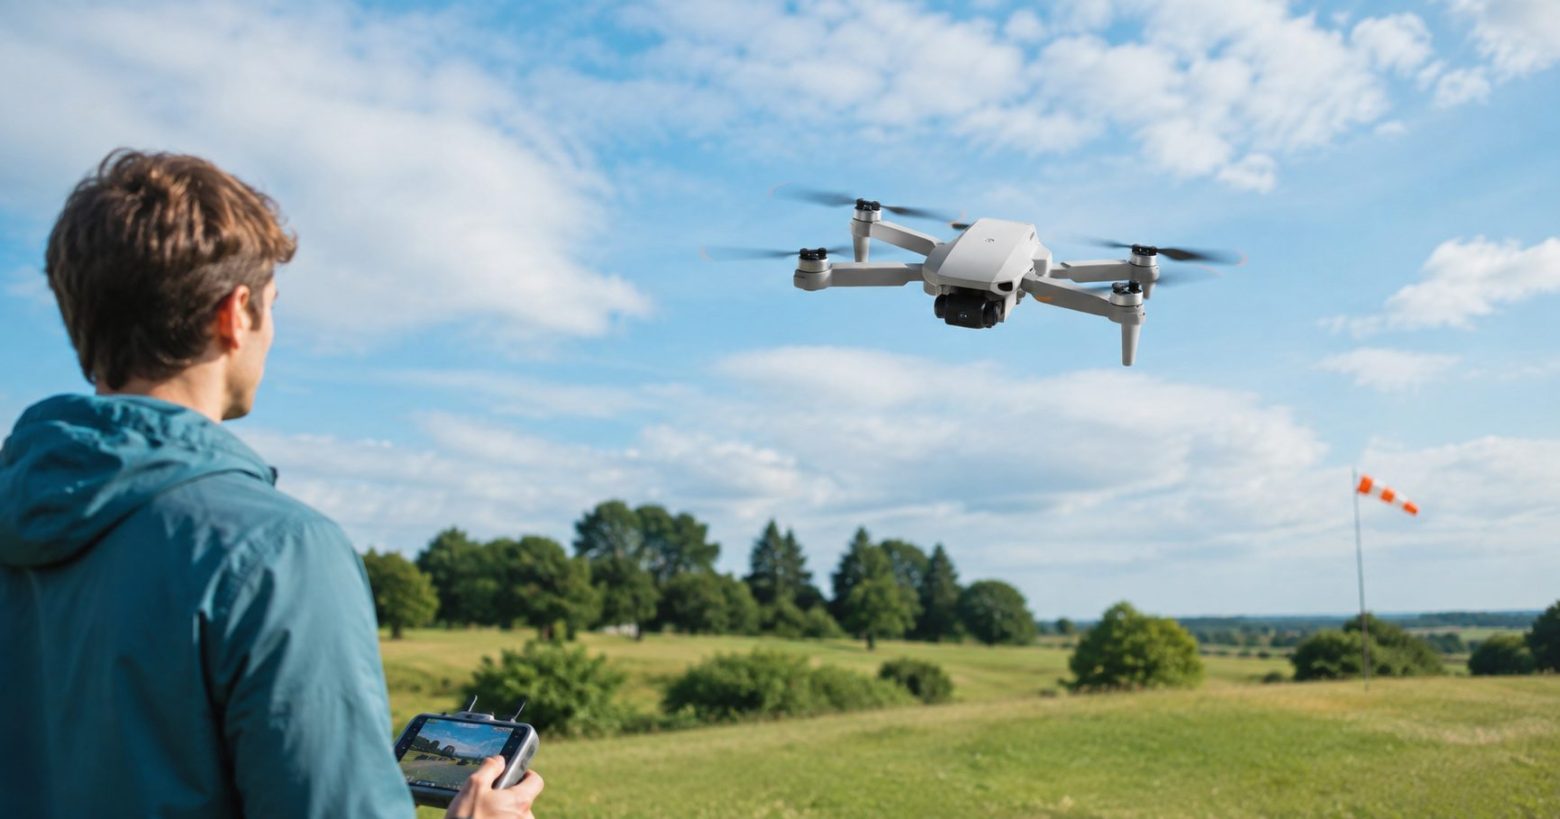
How much wind can a beginner drone handle? There is no universal safe wind speed for every model. Start with the aircraft’s verified wind-resistance limit, compare that limit with forecast gusts rather than only average wind, and keep enough upwind speed and battery reserve for the return flight. When the manufacturer has not provided a wind rating or maximum horizontal speed, treat the limit as To Be Confirmed. For a first outdoor flight, choose calm, steady conditions and land if the drone drifts, tilts heavily, makes slow progress upwind, or uses battery faster than expected.
Use this beginner wind decision:
- Find the model-specific wind-resistance limit and the flight mode to which it applies.
- Compare the forecast gusts—not only the average wind—with that limit.
- Confirm the drone can return upwind with battery and landing reserve.
- If the model limit is unknown, keep the first route short and wait for calm, steady conditions.
Wind is one of the first outdoor conditions that exposes the difference between a small indoor drone and a GPS-assisted camera drone. A model can look stable on the ground, launch normally, and then struggle once it climbs above nearby trees or reaches an exposed shoreline.
The difficult part is that the number shown in a weather app is not a complete flight decision. A beginner must also consider gusts, wind direction, flight altitude, terrain, battery reserve, return direction, aircraft speed, and whether the manufacturer has published a model-specific wind limit.
This guide provides a conservative go/no-go workflow rather than inventing a single mph limit for every product. If you are still deciding whether your first aircraft should use GPS, optical flow, a protected indoor design, or FPV, begin with the first-drone buying guide.
How Much Wind Can a Beginner Drone Handle Safely?
A safe limit must come from the specific aircraft, not from a generic statement such as “beginner drones can fly in a light breeze.” Two drones with similar weight can have different motor output, propeller size, body drag, control tuning, battery voltage, maximum horizontal speed, and automatic warning behavior.
Weight alone does not establish wind capability. A heavier drone may resist small disturbances more visibly, but a lighter aircraft with stronger propulsion and better control response may still make better upwind progress. Brushless motors can improve power delivery and durability compared with basic brushed systems, but “brushless” is not a verified wind rating.
GPS also does not create extra thrust. It tells the flight controller where the aircraft is and helps it correct position, but the motors must still produce enough horizontal force to oppose the wind. A GPS drone can appear to hold position while using substantial power and losing the battery reserve needed for the return leg.
| Wind-Related Data | What It Tells a Beginner | What It Does Not Prove |
|---|---|---|
| Published maximum wind resistance | The manufacturer’s stated operating boundary under its defined conditions | That a beginner should fly at the limit or that gusts above it are acceptable |
| Maximum horizontal speed | Potential ability to make progress against a headwind | Stable hovering, safe landing, or equal speed in every flight mode |
| GPS position hold | The drone can detect position error and command corrections outdoors | Unlimited ability to resist wind |
| Brushless motors | The propulsion system may provide smoother and more durable power delivery | A specific safe wind speed |
| Aircraft weight | One factor affecting inertia, portability, and response | Better wind handling by itself |
| Gimbal or EIS | Helps stabilize the recorded image | That the aircraft has enough flight-control margin |
Decision boundary: When RCDronego has no verified wind-resistance rating or maximum horizontal speed for a model, this article does not assign one. The correct status is Model-Specific / Supplier Confirmation Required.
Read Sustained Wind and Gusts Before a GPS Drone Takeoff
A forecast commonly shows a regular wind value and a higher gust value. The regular value describes the broader wind condition over a period, while a gust is a brief increase above that background flow. The National Weather Service glossary treats a wind gust as a distinct short-duration increase, which is why the gust figure deserves separate attention.
For a beginner drone decision, the gust is often the controlling number. The aircraft may hover comfortably during the lower sustained wind and then be pushed sideways when the gust arrives. The larger the difference between the sustained wind and the gust, the less predictable the flight will feel.
A forecast of steady 8 mph wind is not the same condition as 8 mph with gusts to 18 mph. The average number looks identical, but the second condition creates abrupt changes in tilt, battery demand, ground speed, and landing difficulty. Those numbers are only an illustration of the difference; they are not a model-specific approval limit.
| Forecast Pattern | What the Beginner May Experience | Conservative Decision |
|---|---|---|
| Low, steady wind with little difference between wind and gust values | More predictable hover and control response | Continue to the on-site checks |
| Moderate average wind with much higher gusts | Sudden drift, tilt, and changing return speed | Postpone the first flight unless the model rating and pilot margin are clearly established |
| Wind direction changing repeatedly | Unpredictable crosswind and landing approach | Choose another time or a more sheltered open site |
| Calm at ground level but treetops moving strongly | Higher wind above the sheltered launch point | Do not assume the surface reading represents flight altitude |
| Weather alerts, thunderstorms, fronts, or rapidly changing clouds | Potential sharp gusts and rapid condition changes | No-go for a beginner flight |
A small handheld anemometer can help at the launch point, but it measures only the air moving through that location. It does not directly measure the wind above trees, beyond a ridge, or over the water where the drone may fly. Use it as one input, not as proof that the entire route is safe.
Wind at Drone Altitude Can Be Stronger Than Ground-Level Wind
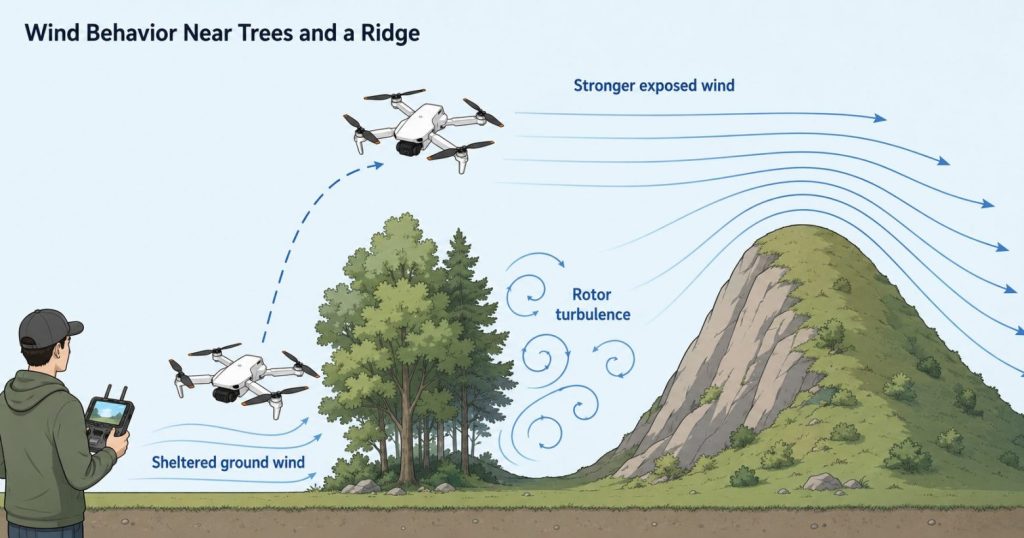
Buildings, trees, fences, and terrain slow or redirect wind close to the surface. A launch area can feel comfortable because it sits behind a row of trees, while the air above the treetops is faster and less sheltered.
The transition between sheltered and exposed air can also create turbulence. When the drone climbs above a roofline, tree line, cliff edge, or ridge, it may move from smooth air into rolling, irregular flow. The result may be a sudden position shift even when the weather forecast has not changed.
Trees and Buildings Can Create Rotor Turbulence for a Small Drone
Air moving over and around an obstacle does not remain smooth immediately behind it. A beginner flying on the downwind side of a building or tree row may encounter changing vertical and horizontal motion. Moving farther away from the obstacle does not always solve the problem immediately because disturbed air can continue downwind.
Ridges, Valleys, and Gaps Can Accelerate Drone Headwind
Wind can speed up as it is forced over a ridge or through a narrow gap. A drone that flies normally in a broad field may struggle when it reaches an overlook, mountain pass, bridge opening, or valley channel. These are poor locations for establishing a beginner’s first wind limit.
Coastlines and Lakes Reduce Safe Landing Options
Open water does not necessarily create the strongest wind, but it removes emergency landing choices and can produce strong reflections that make visual orientation harder. A tailwind that carries the aircraft away from shore can become a headwind during the return, exactly when the battery is lower.
Altitude check: If the launch site is sheltered but treetops, flags, water, or clouds show stronger movement above or beyond it, treat the more exposed condition as the real flight environment.
Calculate the Headwind Margin Before Relying on Return-to-Home
The most important wind question is not whether the drone can hover. It is whether the drone can make reliable progress back to the pilot with enough battery remaining.
A simple planning relationship is:
Estimated upwind ground speed ≈ available airspeed in the active flight or RTH mode − direct headwind component
This simplified relationship applies only to a direct headwind. Crosswinds require vector analysis, and the drone’s return-to-home speed may be lower than its advertised maximum horizontal speed. This remains a planning concept—not a guaranteed performance calculation. Flight mode, battery voltage, gusts, turbulence, propeller condition, temperature, payload, and control limits can reduce the margin further.
Illustrative Beginner-Use Scenario
Assume a hypothetical Model A has a confirmed maximum still-air horizontal speed of 20 mph. The route may require returning into a 15 mph headwind. The simple difference is only 5 mph of theoretical upwind progress before accounting for gusts, turbulence, battery reduction, turns, and landing reserve. That is a poor beginner margin even though the wind is technically below the aircraft’s maximum speed.
This is an illustrative calculation, not an RCDronego product test and not a recommendation to fly Model A in those conditions. It shows why “the drone is faster than the wind” is not enough.
Fly the First Leg Upwind When the Route Allows
A conservative beginner plan is to fly the outbound leg into the wind and return with the wind, provided the site, airspace, and route allow it. The aircraft then uses more energy early, while the battery is fullest, and receives assistance on the return. Flying away with a tailwind can create the opposite situation: fast outbound travel followed by a slow, battery-intensive return.
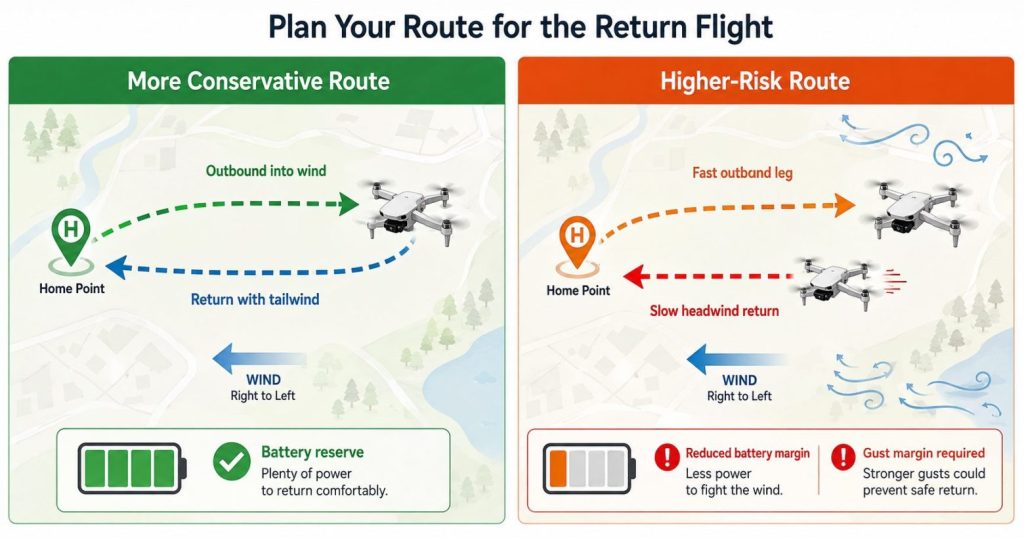
Return-to-Home Does Not Cancel a Strong Headwind
Return-to-home can command a route back, but it cannot create power beyond the aircraft’s available propulsion. The system may also climb to a preset altitude where wind is stronger. Confirm the home point, return altitude, and model behavior before relying on the feature. The dedicated GPS return-to-home guide explains the recovery logic and its limits in more detail.
Wind also reduces the practical range that a beginner can use safely. A long listed control or transmission distance does not mean the battery can support a long upwind return. The GPS drone range guide covers the difference between rated distance and usable real-world range.
Use a Low-Altitude Hover Check Before the First Outdoor Route
A low hover check cannot establish the maximum wind capability of a drone. It can reveal that current conditions are already unsuitable before the aircraft is sent farther away or higher into stronger air.
- Inspect the propellers and arms. Do not evaluate wind handling with damaged, bent, loose, or incorrectly installed propellers.
- Start with a fully charged flight battery and controller. A wind check is not meaningful when the aircraft begins with reduced voltage or an uncertain battery condition.
- Confirm the GPS home point when the model uses GPS. Do not launch into a route while the home point is missing or incorrect.
- Use a wide, clear landing area. Keep people, pets, trees, vehicles, water, wires, and structures away from the test.
- Lift only a few feet and hold position. Observe whether the drone can maintain its location without repeated large corrections.
- Rotate the aircraft slowly. A crosswind may affect the drone differently as its body orientation changes.
- Move a short distance upwind and return. Confirm that the aircraft can make deliberate progress without continuous near-maximum stick input.
- Watch the battery trend. If the percentage drops faster than expected during a short check, do not plan a long route.
- Climb gradually, not suddenly. Stop the climb if drift, tilt, or control effort increases as the drone reaches more exposed air.
- Land while the decision is still easy. A wind check is complete when you have enough information—not when the battery is low.
A successful low hover does not approve a mountain overlook, coastline, or high-altitude route. It confirms only the behavior observed at that place, height, battery state, and moment.
Land When the Drone Shows These Wind-Control Warning Signs
The weather app does not fly the aircraft. Once airborne, the drone’s behavior becomes the more important evidence. A beginner should not wait for complete loss of control before ending the flight.
| Observed Warning Sign | What It May Mean | Beginner Response |
|---|---|---|
| The drone drifts repeatedly despite GPS position hold | Wind or turbulence is exceeding comfortable correction margin | Lower altitude and return for landing |
| The aircraft remains heavily tilted just to hover | Substantial thrust is being used to resist the wind | End the route and preserve battery |
| Upwind ground speed becomes slow or nearly stops | The headwind is approaching available horizontal performance | Turn toward the safest nearby landing option; do not continue farther away |
| The battery drops faster than the calm-day expectation | Motors are using additional power for position and route control | Increase the landing reserve and return early |
| The live view shakes while the aircraft changes position abruptly | Gusts or turbulence may be affecting both aircraft and camera | Do not assume EIS or a gimbal makes the flight safe; land |
| The flight controller displays a high-wind or maximum-power warning | The system has detected reduced control margin | Follow the model instructions, reduce altitude when safe, and land |
| The landing area becomes turbulent | Ground obstacles may be creating irregular flow | Use a clear alternate landing area before battery becomes critical |
Do Not Let a Gimbal or EIS Hide a Wind Warning
A 3-axis gimbal physically moves the camera to keep the frame level, while EIS crops and processes the image to reduce visible shake. Neither system adds propulsion or improves the drone’s ability to return upwind.
S-X1 includes a confirmed 3-axis gimbal with EIS, while GT6 includes EIS. Those features affect footage differently, but the supplied RCDronego data does not provide a verified wind-resistance rating for either aircraft. Smooth video is not evidence that one model is safe in stronger wind.
| What the Pilot Sees | Possible Reality | Correct Wind Decision |
|---|---|---|
| A level horizon | The gimbal may be compensating while the aircraft remains tilted | Check ground speed, battery trend, and warnings |
| Smooth EIS footage | Digital processing may hide smaller movements | Do not use footage smoothness as the wind limit |
| Clear video but falling return speed | The camera and transmission are working while propulsion margin decreases | Prioritize landing over completing the shot |
Judge the wind by route control, upwind progress, battery use, flight-controller warnings, and landing behavior—not by how smooth the recorded image looks.
Do not chase a drifting drone on foot while staring only at the screen. Maintain visual awareness, choose the safest reachable landing area, and avoid directing the aircraft toward people, traffic, water, power lines, or buildings.
Wind Reduces GPS Drone Battery Reserve Before the Listed Flight Time Ends
A listed flight time is not a promise that the same number of minutes will remain available in wind. The aircraft uses energy not only to stay airborne but also to lean into the wind, correct position, accelerate back toward the home point, and stabilize after gusts.
The battery penalty can begin before the pilot notices obvious drift. A GPS drone may hold its ground position by increasing motor output automatically. From the screen, the hover can look normal while the usable return reserve is shrinking faster than it would in calm air.
Wind direction changes the battery demand across the route. A crosswind requires continuous sideways correction. A headwind reduces ground speed and extends the time needed to return. A tailwind can make the outbound leg appear easy, encouraging the pilot to travel farther than the battery can safely support on the way back.
| Wind Effect on the GPS Drone | Battery Consequence | Beginner Action |
|---|---|---|
| Continuous position correction during hover | Higher power use even when the drone appears stationary | Shorten the flight and watch the battery trend |
| Slow upwind ground speed | Longer return time and more energy used per unit of distance | Turn back earlier than the calm-day plan |
| Repeated gust recovery | Rapid changes in motor output and less predictable reserve | Land rather than waiting for a low-battery warning |
| Cold battery plus wind | Potentially lower practical energy availability with higher demand | Use a larger reserve and avoid testing the limit |
| High return altitude in stronger wind | Extra climb energy followed by a more difficult return | Verify the return altitude before takeoff and understand the terrain |
| Extra payload or accessories | Additional lift and propulsion demand | Use only approved equipment and do not reuse calm-day assumptions |
Do Not Convert Listed Flight Time Into a Wind Flight Plan
If a product is listed at approximately 25 minutes, that does not mean the pilot has 20 minutes to fly away and five minutes to return. Takeoff, hovering, climbing, framing, route changes, wind correction, and landing all consume the same battery. The safe route must end with reserve, not at the advertised duration.
RCDronego does not currently have a verified percentage rule that applies to every model in wind. Statements such as “always return at 40%” can sound precise but may be wrong for a particular battery, route, temperature, or headwind. The correct practice is to establish a conservative model-specific reserve from the manual and controlled experience, then increase it when gusts or an upwind return are present.
A Faster Battery Drop Is a Flight Condition, Not Just a Number
Beginners should watch how quickly the battery changes, not only the remaining percentage. A sudden increase in consumption during a climb or upwind leg indicates that conditions are demanding more power. If the trend changes unexpectedly, reduce the route and land while multiple safe options remain.
RCDronego GPS Wind Ratings Remain To Be Confirmed
RCDronego has confirmed data for aircraft weight, positioning systems, motor details, camera systems, and selected flight-time specifications. It does not currently have a verified maximum wind-resistance rating or maximum return speed for XT606, GT6, S-X1, AE20 Max, or XT808.
Evidence boundary: These models should not be ranked by safe wind speed until model-specific supplier documentation or a controlled RCDronego test identifies the sustained wind, gusts, altitude, flight mode, battery condition, upwind speed, warnings, and result.
Use the GPS drone guide for beginners to compare confirmed screen, camera, positioning, range, and listed-endurance differences. Wind capability must remain a separate model-specific confirmation.
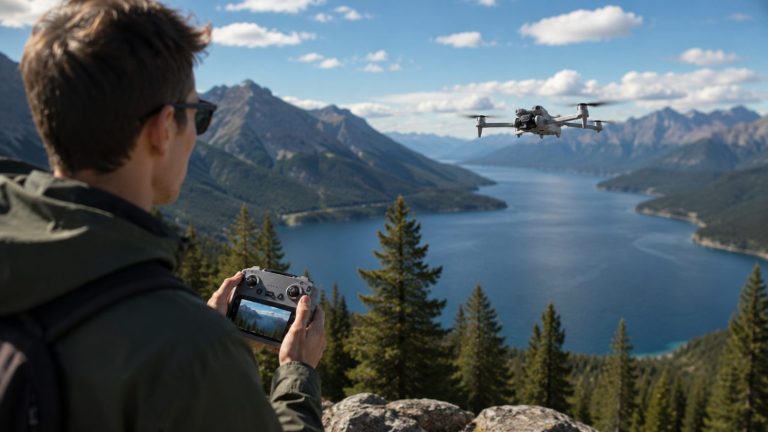
Product images, AI-composited outdoor scenes, stabilized promotional footage, aircraft weight, and the words “brushless motor” are not wind tests. None of them supports an mph, m/s, or Beaufort claim by itself.
Beginner Wind Checklist Before Every GPS Drone Flight
A beginner’s decision should become more conservative when wind combines with exposed terrain, water, cold, uncertain battery condition, or limited landing options. Several moderate risks can create a worse flight than one obvious high-wind number.
No-Go Wind and Terrain Combinations
- Gusty wind near trees, buildings, fences, or ridges: The terrain can create turbulent air while reducing maneuvering space.
- A tailwind on the outbound route: The drone may travel away quickly and then face a slow, battery-intensive headwind return.
- Cliffs, mountain overlooks, narrow gaps, coastlines, or open water: Wind may increase with exposure while safe landing options decrease.
- Cold weather plus wind or an uncertain battery: Available energy may fall while propulsion demand rises.
- Damaged, mismatched, or loose propellers: Do not use windy conditions to discover an existing propulsion problem.
- Thunderstorms, rain, fronts, or rapidly changing clouds: This article does not approve wet-weather or convective-weather flight.
- No verified model wind information and no open practice area: Do not turn an unknown limit into a personal experiment at altitude.
In the U.S., recreational flyers are required to keep the drone within visual line of sight, or use a co-located visual observer. The FAA’s recreational flyer guidance is the official source for U.S. operating requirements. Rules vary by country, so always check local requirements. Visual line of sight helps the pilot recognize drift and changing weather; it does not define a safe wind speed.
Preflight Wind and Return Checks
- Confirm whether the exact model manual provides a maximum wind-resistance value and which mode it applies to.
- Check both sustained wind and gusts for the flight period.
- Identify wind direction relative to the home point, outbound route, and landing area.
- Look for stronger air above the launch site, including moving treetops, flags, or exposed water.
- Use a fully charged, known-condition flight battery and inspect the propellers, motors, arms, and battery latch.
- Confirm GPS lock, the correct home point, and the return altitude before route flight.
- Plan the first leg upwind when the location allows a safe return with the wind.
- Complete a low-altitude hover and short upwind-progress check before climbing or traveling farther.
- Watch the rate of battery use, not only the remaining percentage.
- Keep a larger return and landing reserve than on a calm day.
- Land when drift, heavy tilt, slow upwind movement, rapid battery loss, or a high-wind warning appears.
- Maintain visual line of sight and a clear alternate landing area throughout the flight.
Beginner go/no-go rule: If you cannot confirm the model limit, explain the return route, or identify a safe landing option, postpone the flight. A missed video opportunity costs less than a lost aircraft or an unsafe landing.
Frequently Asked Questions About Beginner Drones and Wind
There is no universal safe number. Use the exact model’s verified wind-resistance limit and maximum horizontal speed, compare gusts rather than only average wind, and keep a substantial return and battery margin below the published limit. When a model rating is unavailable, treat it as To Be Confirmed and choose calm, steady conditions for beginner practice.
Check both, but use the gust value as the more conservative control number. A drone may hover during the lower sustained wind and then drift or tilt when a gust arrives. A large difference between average wind and gusts also indicates a less predictable flight for a beginner.
No. GPS helps the drone identify position error and command corrections, but the motors still need enough power to oppose the wind. A GPS drone can hold position while using substantial battery, and return-to-home cannot overcome a headwind that exceeds the available flight margin.
When the route and site allow it, flying the first leg upwind uses more power while the battery is fullest and allows the return leg to receive a tailwind. Flying away with a tailwind can create a difficult headwind return after the battery has already been used.
A 3-axis gimbal stabilizes the camera, not the aircraft. It can keep footage looking smoother while the drone is tilted or making repeated corrections. Wind capability still depends on propulsion, aerodynamics, control response, battery condition, flight mode, and the manufacturer’s verified limits.
Land when the drone repeatedly drifts, remains heavily tilted, makes slow or no progress upwind, uses battery faster than expected, shows a high-wind or maximum-power warning, or becomes difficult to land predictably. Lower altitude when safe and choose a clear landing area before the battery becomes critical.
The Bottom Line
How much wind can a beginner drone handle? Only the verified model data, current gusts, route direction, altitude, battery condition, and observed flight behavior can answer that responsibly. Do not turn GPS, brushless motors, weight, or a gimbal into an unsupported mph claim. Check sustained wind and gusts, assume exposed air may be stronger than the launch point, fly the first leg upwind when practical, preserve a large return margin, complete a low hover check, and land at the first sign that the aircraft is losing comfortable control margin.